Showing posts with label Sewing. Show all posts

Tuesday, May 29, 2012

Busy Time

So much going on over the last few weeks.  I've been waaaaaaaaay busy!!

Remember the bed I made last month for my niece's dog, Milo?

I think he likes it.
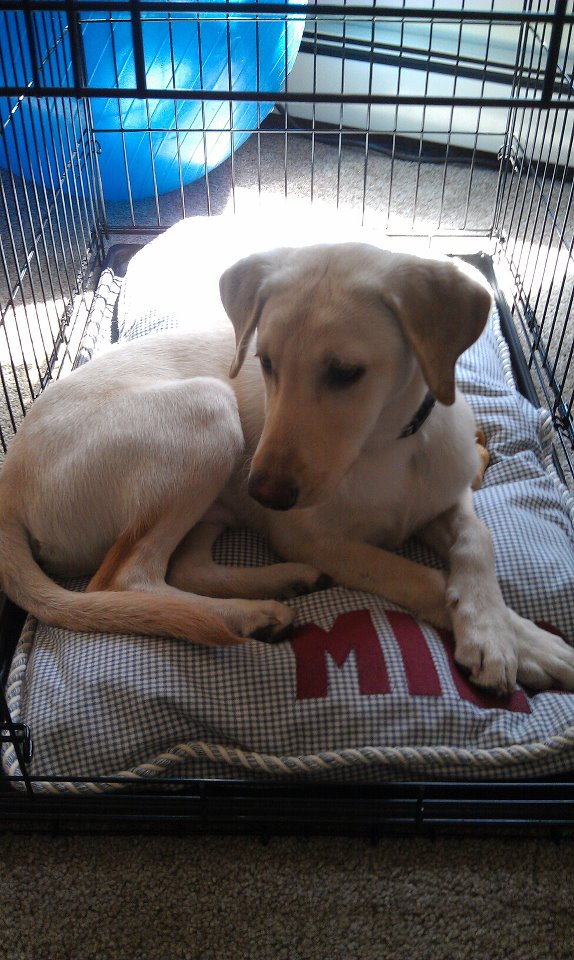
Doesn't he look comfortable?

Too bad he roots for the wrong team.  I'm a die-hard Red Sox fan, and I wish he had better taste!

 I bought this framed print at an auction.  I love the simple rose print, matted with sage-colored silk.  The gold frame, not so much...........

So I painted the frame.

Then I got busy in my kitchen and dining room.  I did the semi-annual decor switch.  I like red in the fall and winter, and plum in the spring and summer.

So into the attic went the red valances.......

.........and the red rugs.

And up went the plum-colored valances (in the dining room),


cornices (in the kitchen),

and rugs.  This is the dining room rug,

and these throw rugs are in the kitchen.  And then I switched the dishes.  And the pictures on the wall.    
And the towels, potholders, napkins, placemats and dog dishes.  Yes, dog dishes.  Out with the red, in with the plum.  For six months.  Then I'll switch back.  

I started thinking that it's been several years since I sewed those valances, so maybe it's time for a change, time to freshen up the look and sew something new..........and then I stopped and gave myself a reality check.  Maybe next year.

I've also been spending lots of time at the ball field!  Evenings spent coaching a team of 13 to 15-year old boys (we are currently in second place in our 10-team league), 

and afternoons watching Erin pitch for her high school softball team.

And then it was time for the Senior prom (that's Sean in the middle, behind his date in the pink and white dress).  

Yes, Senior prom and then.........

his graduation!

And this past weekend, a graduation party for Sean.  Which means that for the last month, I've been frantically trying to get my garden in shape for the party.

 Filling the planters on the front steps......

 and on the deck..........

 and by the back door........

and by the driveway..........

 and then hoping that I can keep them healthy and thriving!

 The hanging baskets..........

at the front door.......

 the boxes on the deck..........

 the window boxes,

 newly installed for this year.........

wondering if I planted the right flowers for the amount of sun and shade that they will receive?

And in the midst of my preparations, goofing around with my camera, taking pictures of the perennials that are currently in bloom!

 The clematis......


 dianthus.......

and my favorite peonies.

And a new favorite, in my deck boxes.  I don't even know what this flower is called, but I love the way it's starting to trail down the sides of the containers.

Tuesday, February 28, 2012

Blog Anniversary, Etsy And A Giveaway!

I'm just a few days away from my blog anniversary.  I can't believe it's been a year already!

And--today I crossed another one of my New Year's resolutions off my list.  I've opened a shop on Etsy!  Someday, I will figure out how to add a link to the sidebar on this blog, but for now, you can click here if you want to check it out.

For now, I'm just listing some of pillows that I've made using scraps of vintage linens and tablecloths, fabrics from the '30's, '40's and '50's.

They've been piling up.

I still have more to list, so stay tuned!

I thought I would celebrate my anniversary and the opening of the Etsy store with a giveaway.  The winner will receive..........a pillow!  
Pillow #1:
The center of this pillow is a trail of embroidered roses from a vintage linen table runner.  Framed with pink stripes and a vintage-inspired floral print.  Surrounded with fluffy pink vintage pom poms.


Pillow #2:
A patchwork of vintage chenille squares, framed with new, fluffy white chenille and vintage pink pom poms.

Pillow #3:
A bouquet from a vintage tablecloth, framed with polka dots, rick rack, ticking stripes and vintage pom poms.

All of these pillows have a slip opening in the back, and each pillow measures approximately 19" x 19".

If you would like to win one of these pillows, here is how you can enter:

Leave a comment, telling me which pillow you would like to win.  You can elaborate as much as you like, or simply write "#1," "#2," or #3."  And if you also become a follower of this blog, you will be entered twice.  (And anyone who currently follows this blog will also be entered twice if they leave a comment!)

Winners will be drawn on Saturday, March 3.  Good Luck!

Today, I'm also linking up with Sue at It's A Very Cherry World for her Rednesday blog party!

Thursday, January 5, 2012

Broiled Marinated Flank Steak

I've been busy!

All the Christmas decorations have been taken down and packed away 'til next year.
 Gus has ditched his jingle bells for a spiffy new scarf.  Gus is happy.  Seriously.  He loves new clothes.
Here he is when I was ironing the fabric that I used for the lining of his scarf.  I iron all the time.  (Boy, do I iron all the time.)  He never gets excited about it.  
I iron some fabric to make him a scarf, he gets all excited with anticipation.


How does he know the difference between boring ironing and ironing that is for him?  He just knows.
While I was sewing his scarf in the land of a thousand unfinished projects (also known as my sewing room), I decided to finish one more project.

Two pillowcases, sewn.  And trimmed with a nice scalloped crochet edge.

I have so many projects and recipes that I haven't posted.  The photo files are piling up and I'm imagining them all saying, "pick me! pick me!"  And tonight's winner is.........broiled marinated flank steak--prep it in advance, minimal ingredients, let the marinade work its flavorful magic while you do more important things!

Tuesday, December 6, 2011

Chicken Tortellini Soup......and a Christmas Towel Tutorial

I have not ever found a vintage Christmas tablecloth that I didn't want to take home with me.

The fabric! The graphics!  The colors! 


Though the tops may be covered with faded stains,

the good stuff remains along the sides.

Waiting for me to frame in a pillow

or embellish towels for my kitchen.

Fifteen minutes from start to finish.

Wanna know how I make them?

First, just like when you're cooking, you gather your ingredients.

You will need:

-An image, cut from a vintage tablecloth.  
-Coordinating rick rack
-Iron-on adhesive (double sided, like HeatnBond)
-Wonder tape (1/8" wide)
-a kitchen towel

You will also need your iron and a sewing machine.

First, I decided on an image.

Should I pick the candy cane?

Or perhaps a wreath, tree or band of merry musicians?

The musicians and the wreath were too big for my towel.  The tree is too similar to the one I used on a towel I made last week.

I'm going with the candy cane.

I cut the image of the candy cane from the tablecloth.  I decided to go with a simple rectangular shape.  No crazy angles or curves.

I did a quick mock-up, placing the image where I thought it should go, and deciding which trims I would use.

If the tablecloth has a coordinating border, I usually cut a strip of the border for the bottom of the towel.  

I did not like the border on this tablecloth, so I decided to trim the bottom of the towel with rick rack.

And I took the rick rack away, just to see what the towel would look like without it.

I decided I liked the way the rick rack looked.

Cut a piece of the iron-on adhesive to iron onto the back of the image.  It does not have to be a perfect shape, you just want to use it to hold the image in place.

See?  Not perfect.

Iron it on, paper side up on wrong side of image.

Peel the paper off, and now the adhesive will be on the fabric.

Do the same with the Wonder tape, adhere it right down the center of your rick rack.

Carefully peel the paper off, and the adhesive has transferred onto the rick rack.

I like to use iron-on adhesive to hold my images and embellishments in place before I sew them.  No pins involved.

Arrange your rick rack and image on your towel.

Iron it into place.  The adhesive bonds almost immediately.  Just quickly glide the iron over the image and rick rack without stopping.

Once the transferring is done, you are ready to sew your image and trims into place.

First, just do a quick straight stitch around the border of the image.

After the towel has been washed, you'll get some really cool texture going on with the stitching around the border of the image.

Then, straight stitch right down the middle of the rick rack.  You could do a zig-zag stitch instead, but I don't want to scare you.  A straight stitch will also get the job done.

And stitch right down the center of the rick rack that borders the image.


And you're done!

No lie, it took me 17 minutes to embellish this towel, and that included the time it took me to take the pictures.

Including this picture of Gus.  I didn't want him to feel left out.